Creating Rates
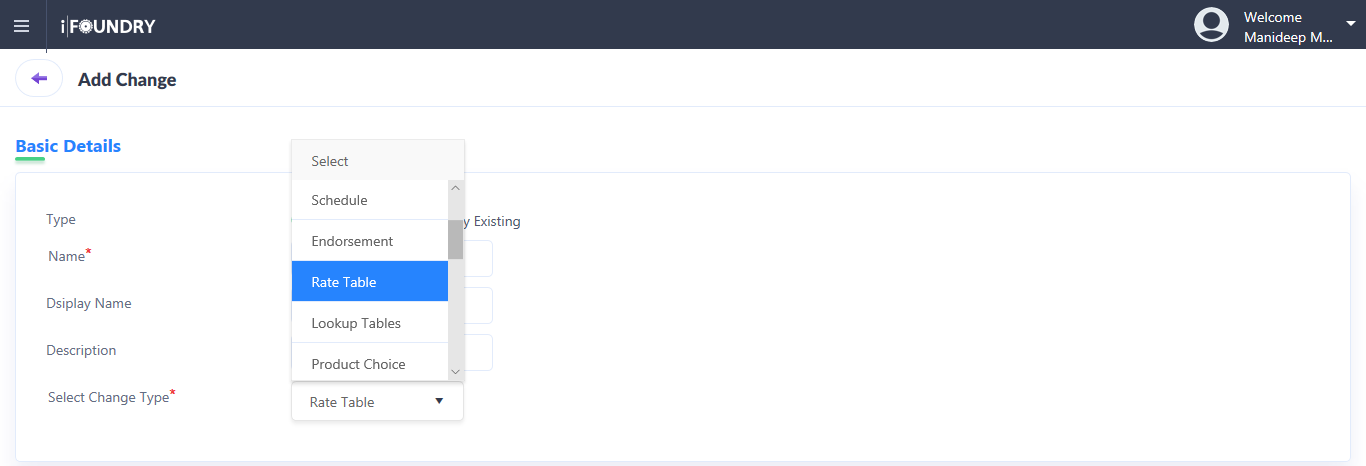
The methodology for Rates is the same as Risk. However, to create Rates, choose Rate Table in the Change Type drop-down as appearing under Basic Details.
Adding a Rate Table
After creating the Rates Change Type, rate tables must then be configured. To do so, follow the steps mentioned below.
-
Upon successful creation of Rates, as mentioned in the steps above, click on edit that appears among the set of actions list against the risk created.

|
NOTE: Clicking on the display name of the Rate Table, as appearing in the list of changes, will only provide an overview of the information as configured and enable the user to edit any information. |
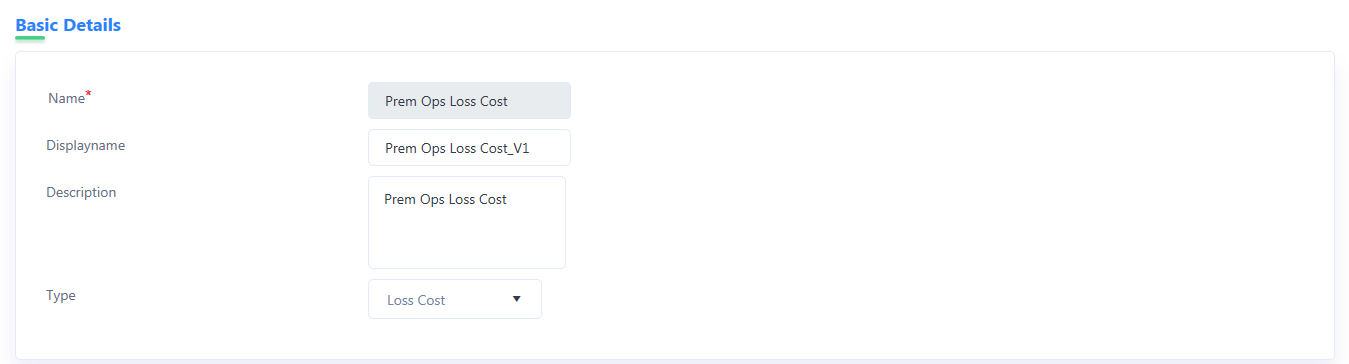
2. In the new window that appears, under Basic Details, provide details as mentioned below.
Name: The name of the rate table, as configured while creating the same appears by default.
Display Name: Input the desired display name for the Rate Table.
Description: A generic description pertaining to the Rate Table can be included here.
Type: From the list of Rate Table Types, choose the applicable from the drop-down.
Base Rate, Base Premium, Minimum Premium, Tax Discount Factor, Credit Factor, Factor Fee, Loss Cost, Stat Code, Loss Cost Multiplier, Multiplier, Limit Factor, Deductible Factor, Late Classification, Surcharge, Preliminary Base Premium, Discount, Code, Premium, Debit, Expense Constant, etc.
3. Under Lookup Columns, click on the ‘+’ icon to create a new Lookup Column.

4. Clicking on the ‘+’ icon results in a new Lookup Column being created where the following information must be input.
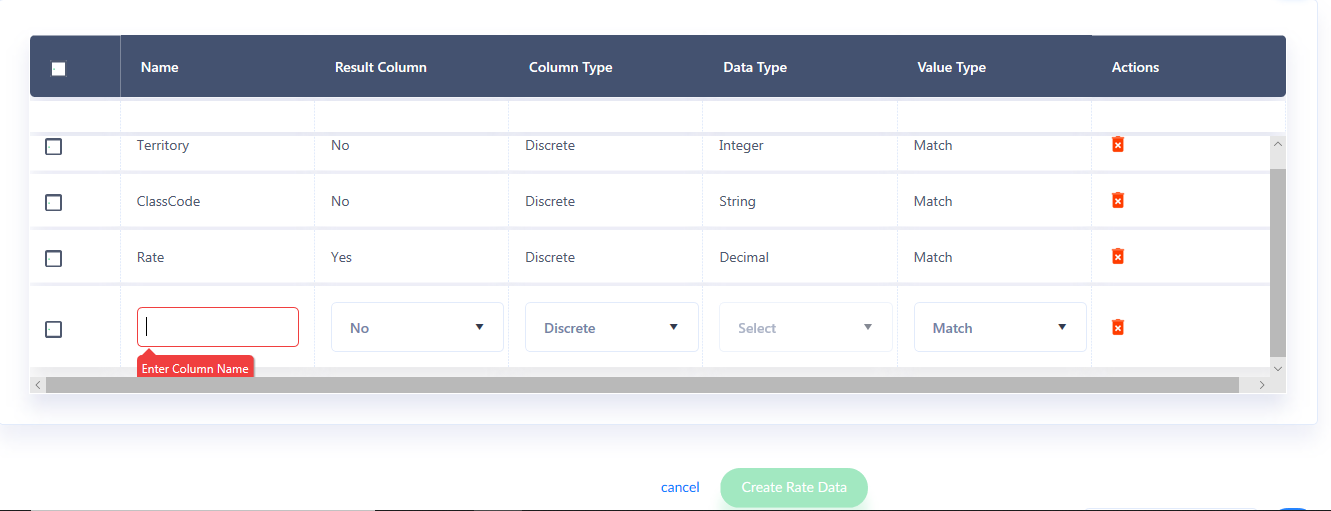
Name: Input a desired name, such as Territory, ClassCode, Rate, etc.
Result Column: Based on the requirement, input whether Yes or No.
Column Type: Choose whether the column type is Discrete or Range.
Data Type: Choose whether the data type is an Integer, String, Decimal, etc.
Value Type: Select the applicable Value type such as Match, Forecast, Interpolation, Extrapolation, InterpolationExtrpolation.
Actions: The action tray only provides the user the ability to delete the lookup column.
4. Under the Rate Data section that appears, click on ‘+’.
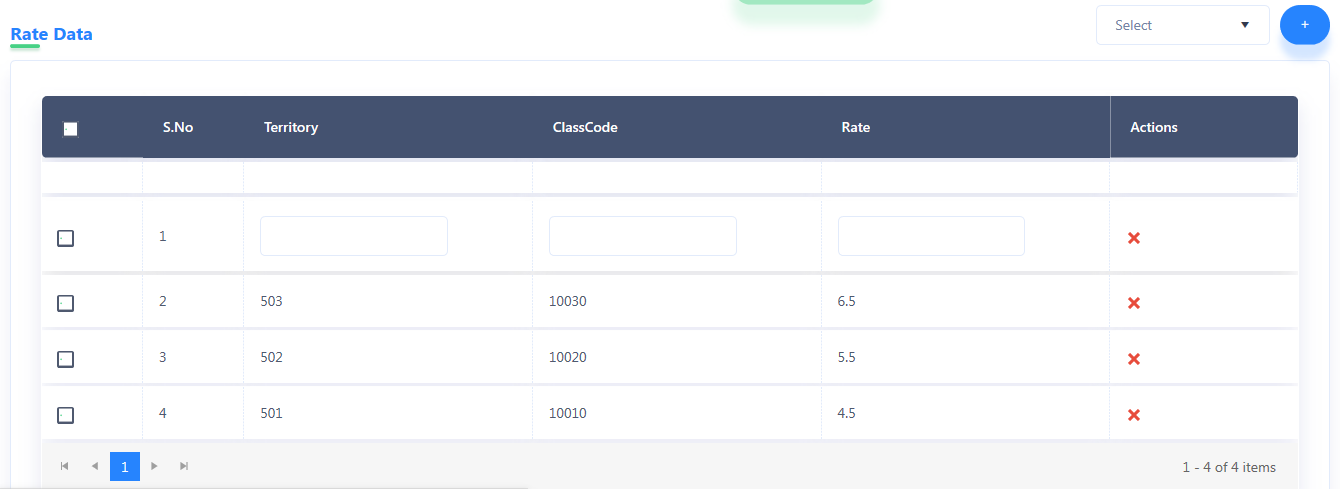
Clicking on the ‘+’ icon results in a new Rate Data column being created where the following information must be input.
Territory: Input the applicable territory code.
ClassCode: Input the applicable Class Code.
Rate: Input the applicable rate.
Actions: The action tray only provides the user the ability to delete the newly created Rate Data.
5. Once all the required information has been provided in the sections as mentioned above, click on Submit.
6. In doing so, the configured rate table is added to the Rates Change Type, which can then be pushed into a Change Event.